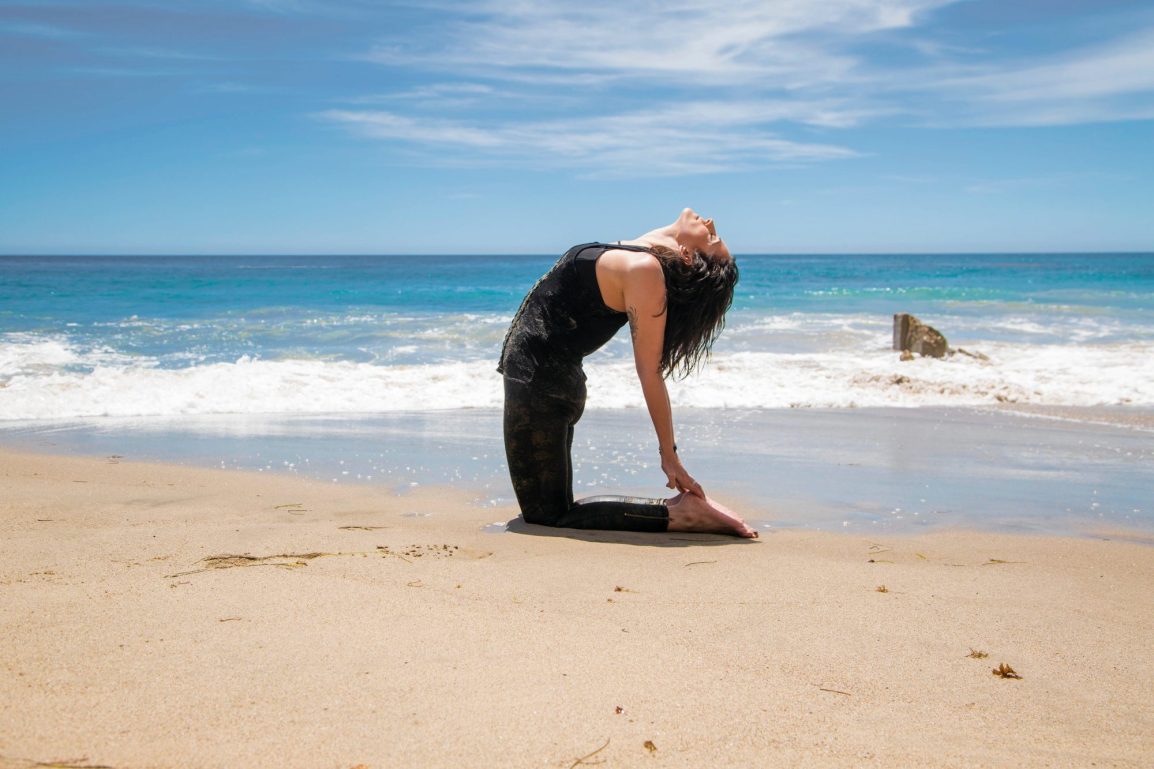
Backbends are some of my favorite yoga poses to practice! I love the way they make me feel, and I love the way they challenge me. Also, how cool are they? The shapes we can make with our bodies still fascinates me. As with most or even all yoga poses, backbends offer many benefits, let’s take a look at some of those benefits, as well as poses to get you started.
The world we live in today is not very conducive to having a healthy spine and neck, let alone a healthy body, period. We spend a majority of our time sitting, typing, texting, driving. All of these activities are extremely damaging to our bodies. When we text we typically look down at our screens. This posture we’ve adopted is causing increased stress on the neck, as well as excessive wear and tear. Sitting, we sit A LOT! Sitting in the car, at our desks, on the couch, etc. Let’s take a look at what this sedentary lifestyle has in store for us…
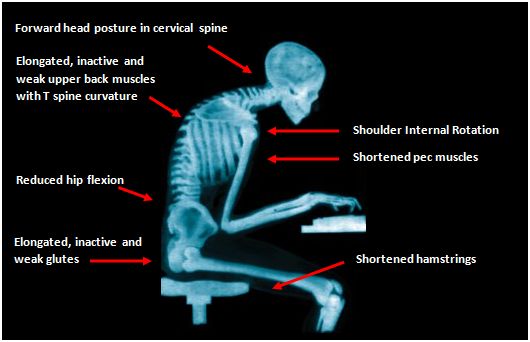
Sitting interrupts the flow of blood in our bodies. This can cause high blood pressure, elevated cholesterol, and cardiovascular disease. Inactivity can cause muscle degeneration, as well as tight muscles and joints. You might see permanent imbalances in the neck due to strain on the cervical vertebrate. You might notice that your spine has become less flexible, and maybe your doctor has told you that you’re experiencing some damage to your discs. Sitting for long periods of time doesn’t allow the discs in our back to expand and contract, which allows them to soak up fresh blood and nutrients. If this doesn’t happen the collagen will harden around the tendons and ligaments, causing disc problems. If all of this isn’t enough, the damage our lifestyles cause to our organs and digestive systems should top it off nicely.
WE NEED TO MOVE PEOPLE. Check out the benefits of backbends and some fun poses to play around with below.
Benefits Of Backbends
- Counteracts the side effects of slouching by opening the chest and the areas around the chest.
- Helps to alleviate breathing problems. Backbends open and create space in the chest by stretching the muscles of the chest. They also relieve pressure on the diaphragm which can be caused by sitting in a slouching position for extended periods of time. Backbends can teach us how to breathe again by allowing expansion of the lungs and strengthening the muscles that allow us to breathe.
- Backbends are very stimulating and can work well for fatigue. They can also help elevate your mood.
- Improve posture by strengthening the muscles of the spine and shoulders. They also strengthen the legs, back, and arms
- Stretch the chest, belly and hips
- Backbends have been known to be “Heart Opening” and can be very emotional. They have a tendency to elicit strong emotional feelings. You’re literally opening your chest, exposing your heart, and they can be very vulnerable. However, backbends can cause major breakthroughs and they can relieve anxiety and stress.
CAUTION
As always please practice caution while performing any yoga poses. Specifically for backbends, please consult your doctor if you’re experiencing any of the following:
- Pregnancy
- Back Problems: Disc problems, facet joint syndrome, stenosis, injury, recent surgery, spondylolisthesis, spondylolyis, osteoporosis
- Shoulder, wrist, and neck injuries, surgeries, or problems
- Chronic fatigue
- Hernia
- Migraine Headaches
- If you suffer from chronic anxiety, stress, or depression
Poses
Make sure you warm up properly before performing any of the following poses. Most backbends are actually the peak pose in a yoga sequence. Also, make sure you cool down after, performing follow-up poses for backbends. It’s easy to find backbend sequences online.
Enjoy & Practice safely.
Bhujangasana – Low Cobra
- Palms press down into the floor, directly stacked under the elbows
- Draw the elbows in towards one another, upper arms parallel to the floor
- Widen the chest, spreading across the collarbones
- Roll the shoulders back and down away from the ears
- Gaze straight forward, keep the neck long and relaxed
- Root down through the tops of the feet, toes point straight back
- Lift the inner thighs up towards the ceiling, outer thighs firm in towards one another
- Keep the pelvis neutral, neither arching or rounding the lower back
Urdhva Mukha Svanasana – Upward Facing Dog

- Root down through the palms of the hands, lift up through the forearms
- Draw the upper arms back, shoulders stacked directly above the wrists
- Spread across the collarbones and draw the shoulders in towards one another
- Draw the shoulders away from the ears
- Gaze is slightly lifted, sides of the neck lengthen evenly, do not compress the neck
- Lift the front of the body from the navel to the sternum, soften the front ribs
- Lift the entire leg off the floor, reaching back through the legs, feet and toes
- Inner thighs lift up towards the ceiling
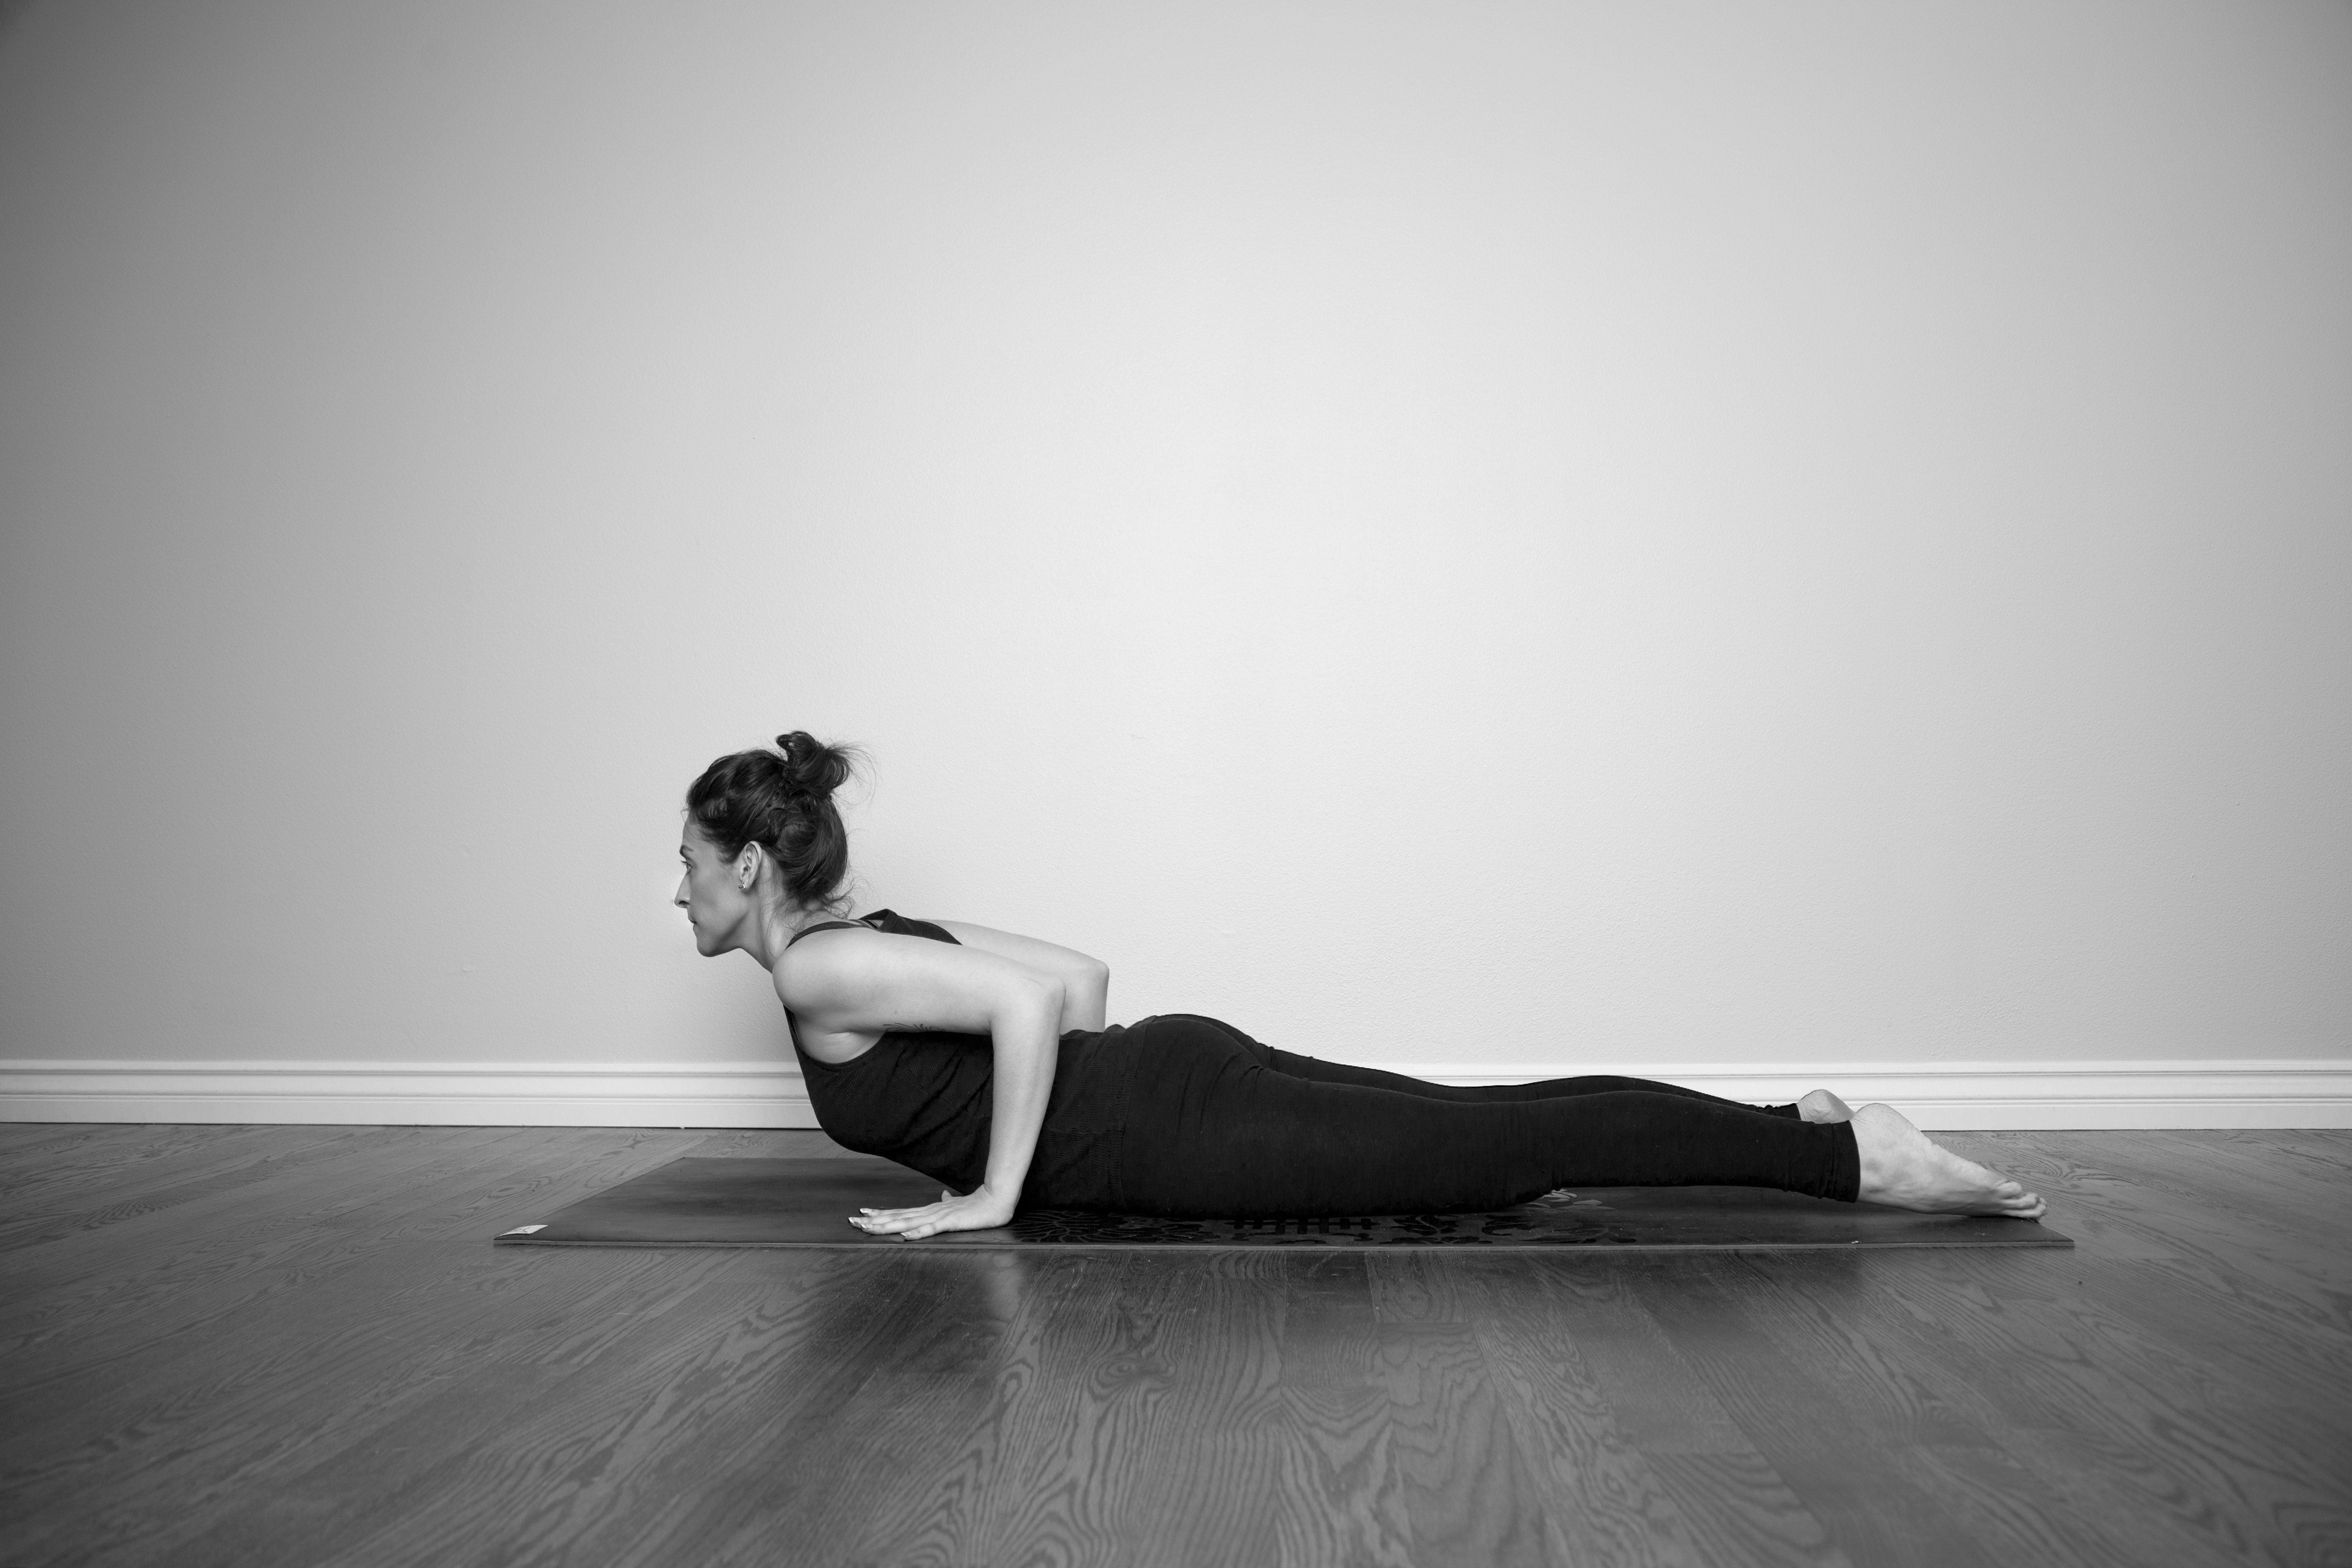
Salabhasana – Locust Pose
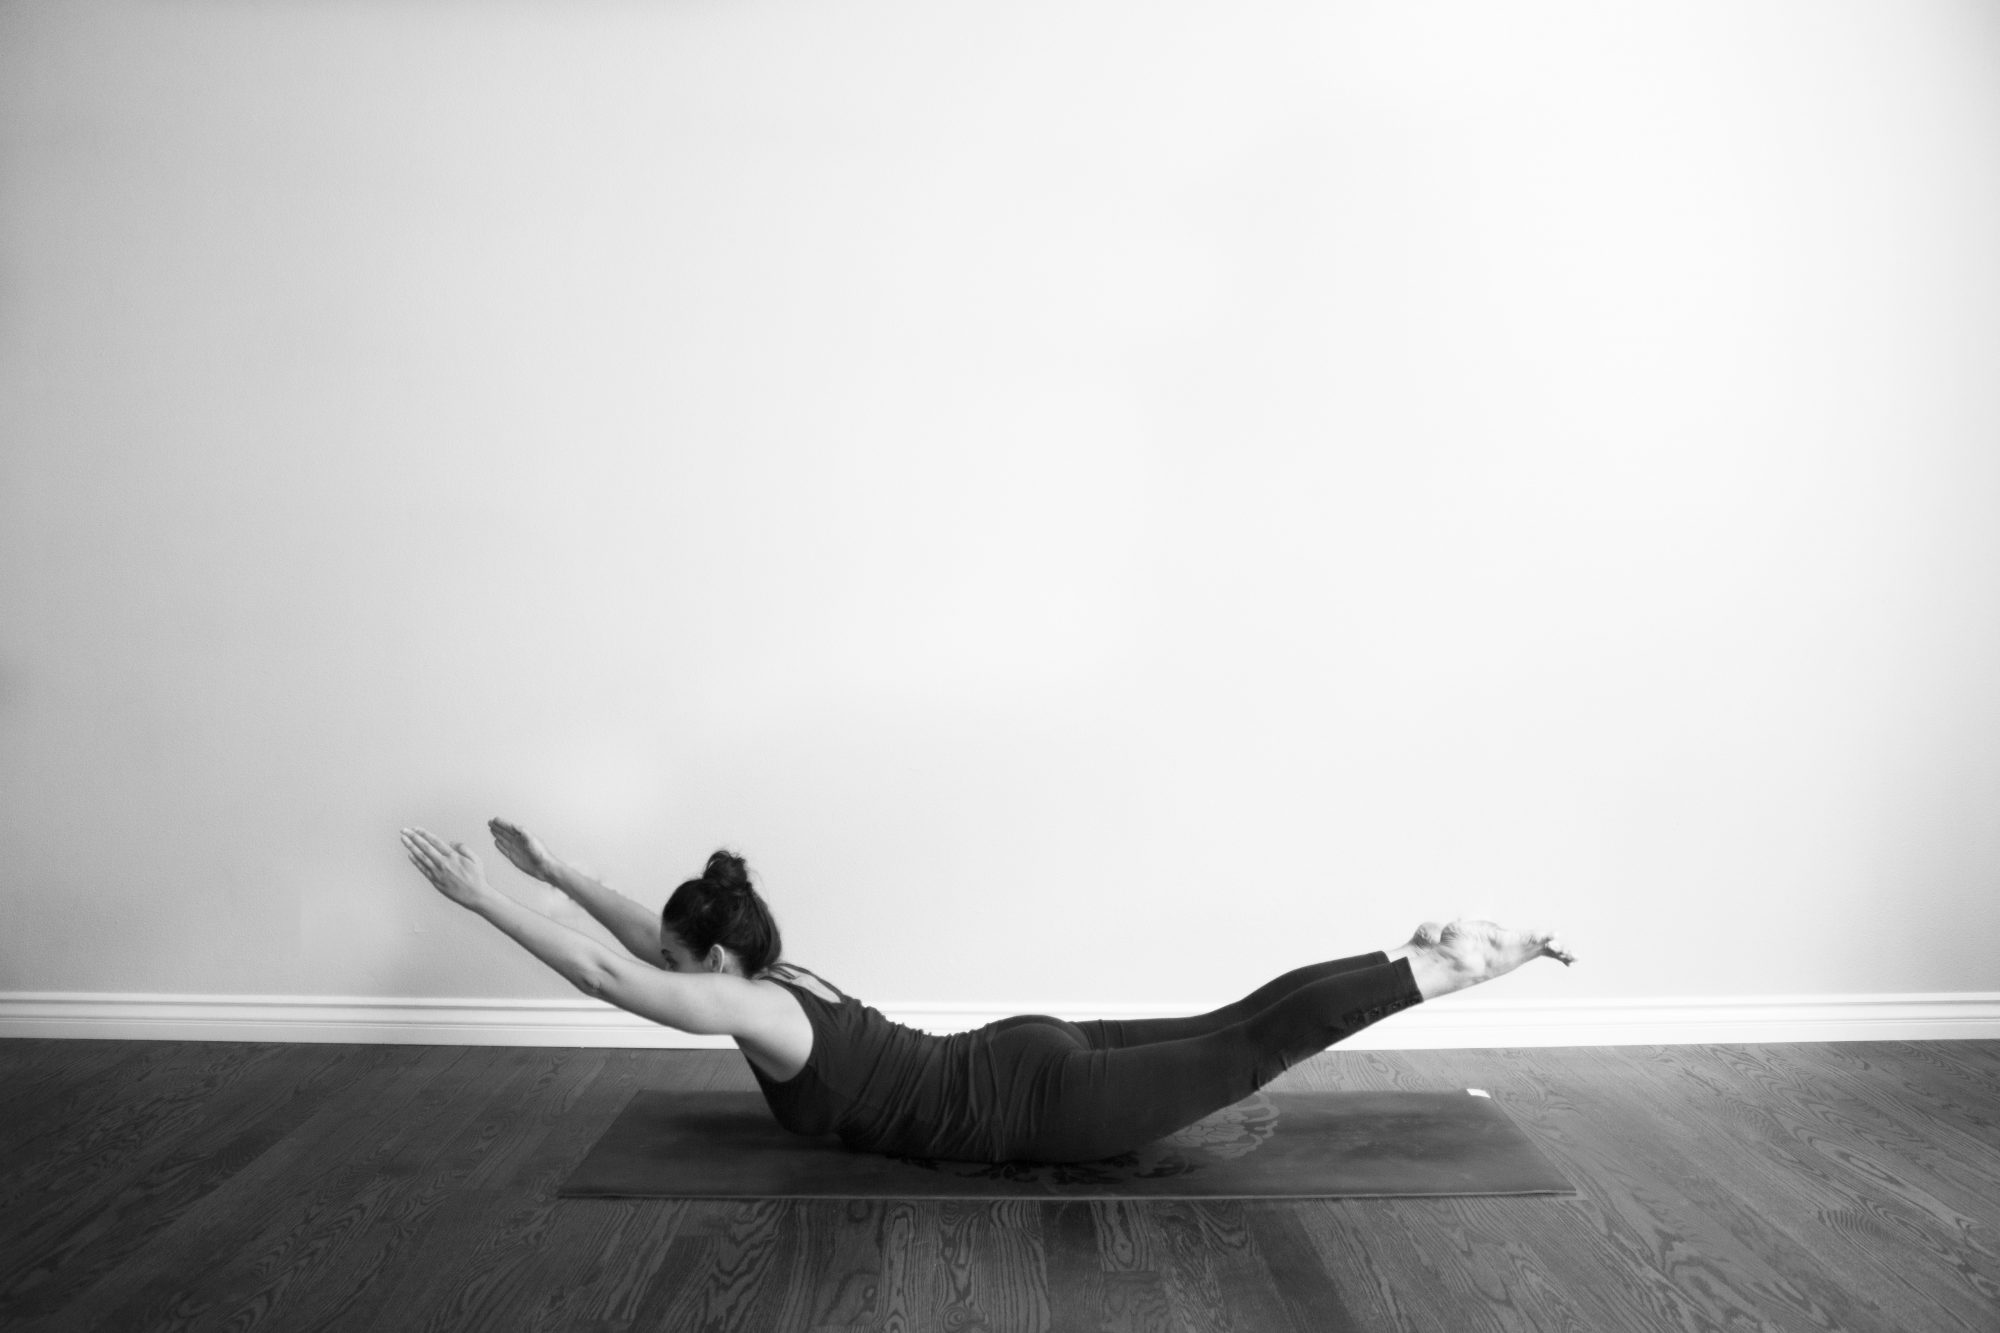
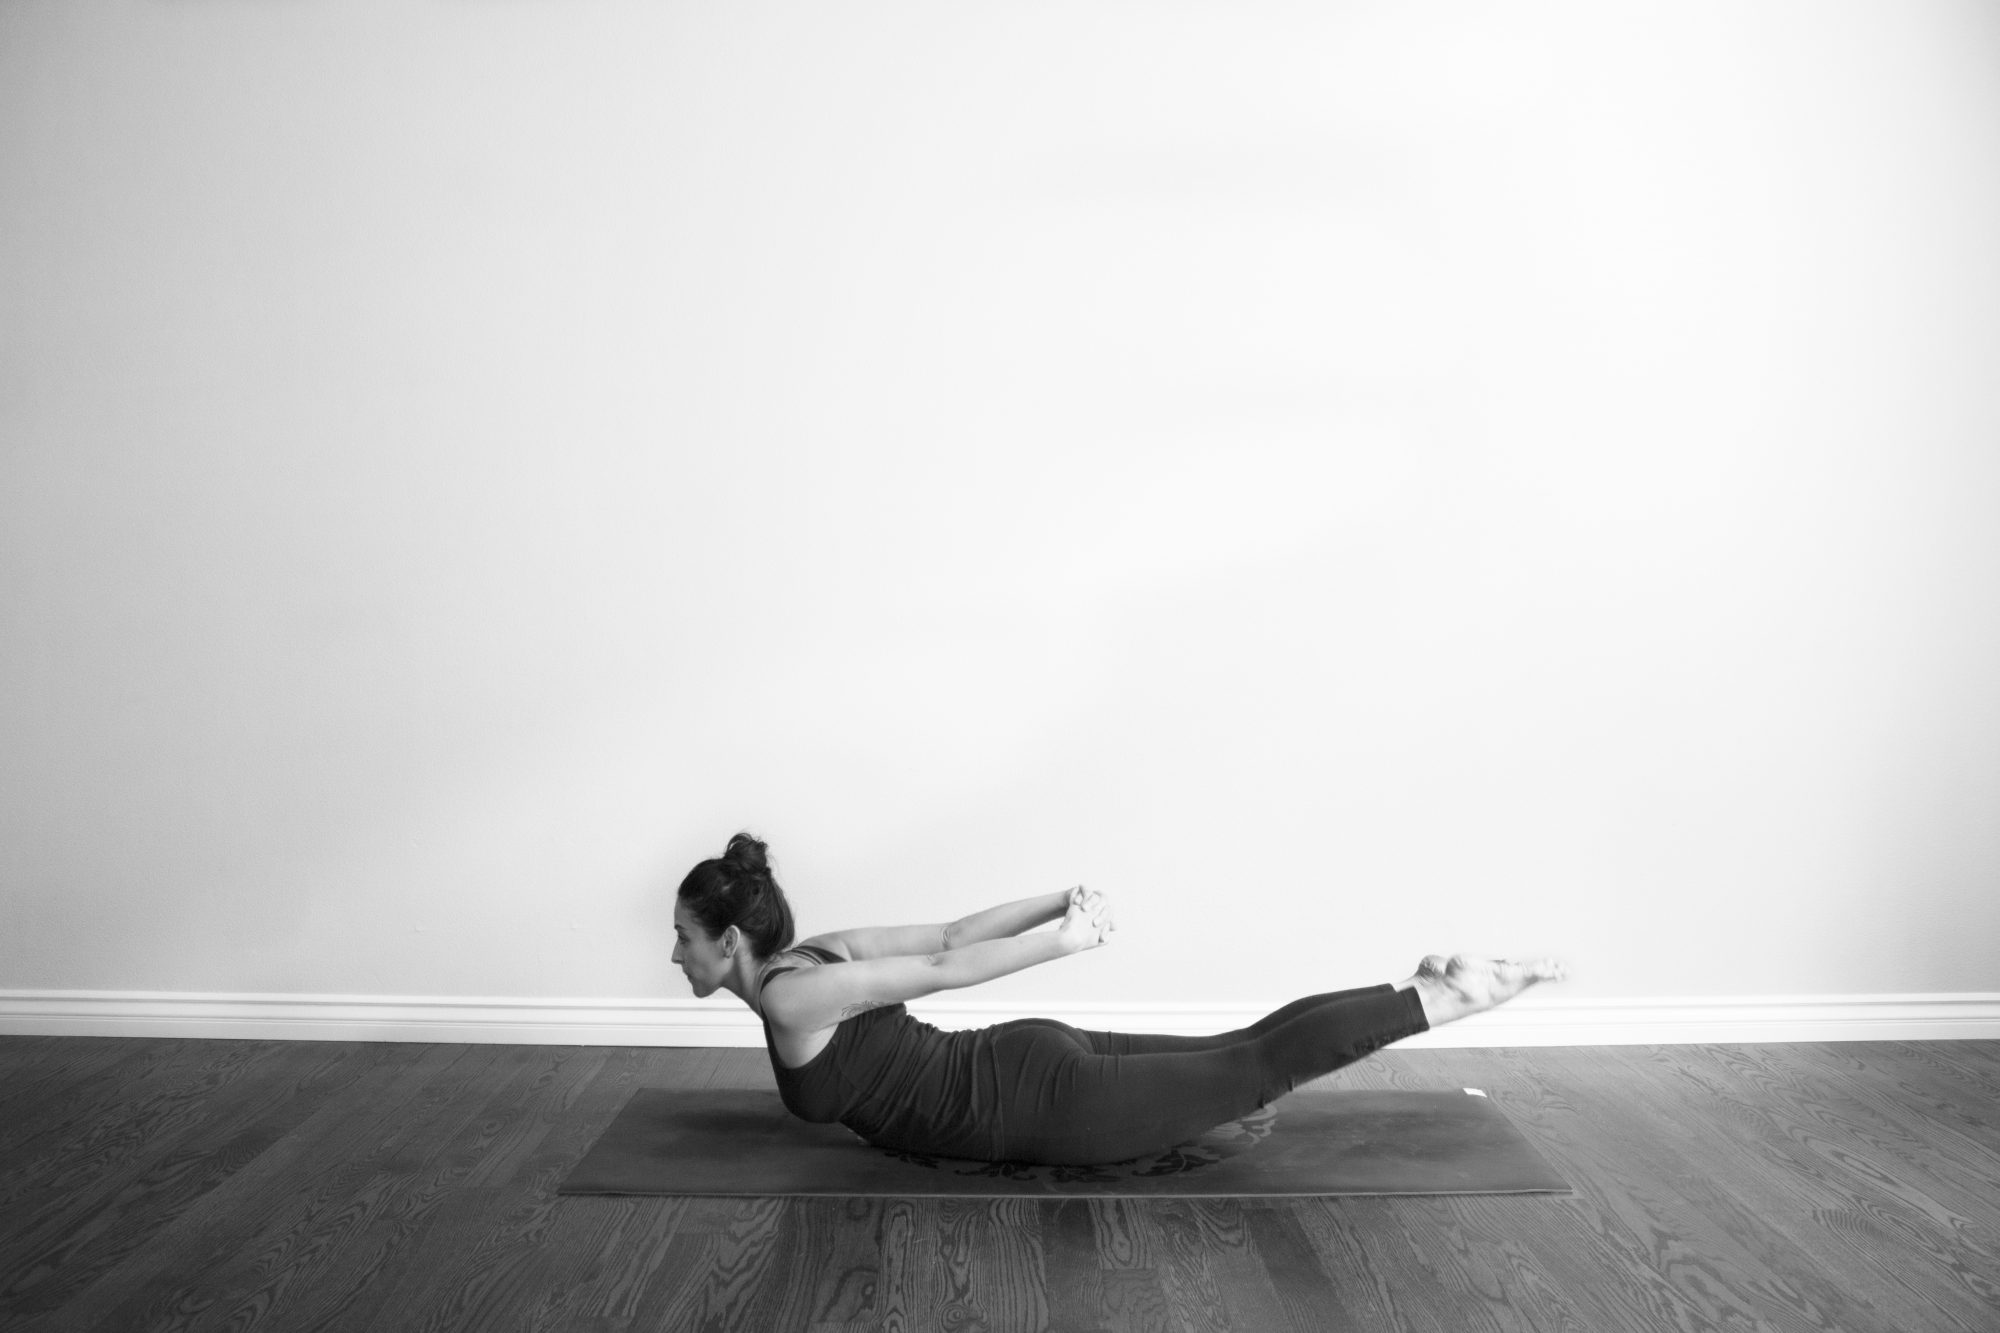
- There are many variations for this pose, but I’ve given two, as shown above. If you’re lifting the arms up and forward keep the arms straight, palms facing one another. Lifting up through the sternum. If you’re going to bring the arms back alongside the body, keep the arms straight and reach the fingers towards the feet (or interlace the fingers). Lift the upper arms up and away from the floor.
- Open the chest, widen across the collarbones
- Widen the upper back, and release the shoulders blades away from one another
- Reach out through the balls of the feet
- Reach back strongly through the legs, so strong that they lift off the floor
- Inner thighs lift towards the ceiling as you roll the outer legs towards the floor to widen the backs of the thighs
- Release the flesh of the buttocks away from the waist and down towards the heels
- Lengthen the torso forward
Setu Bandha Sarvangasana – Bridge Pose
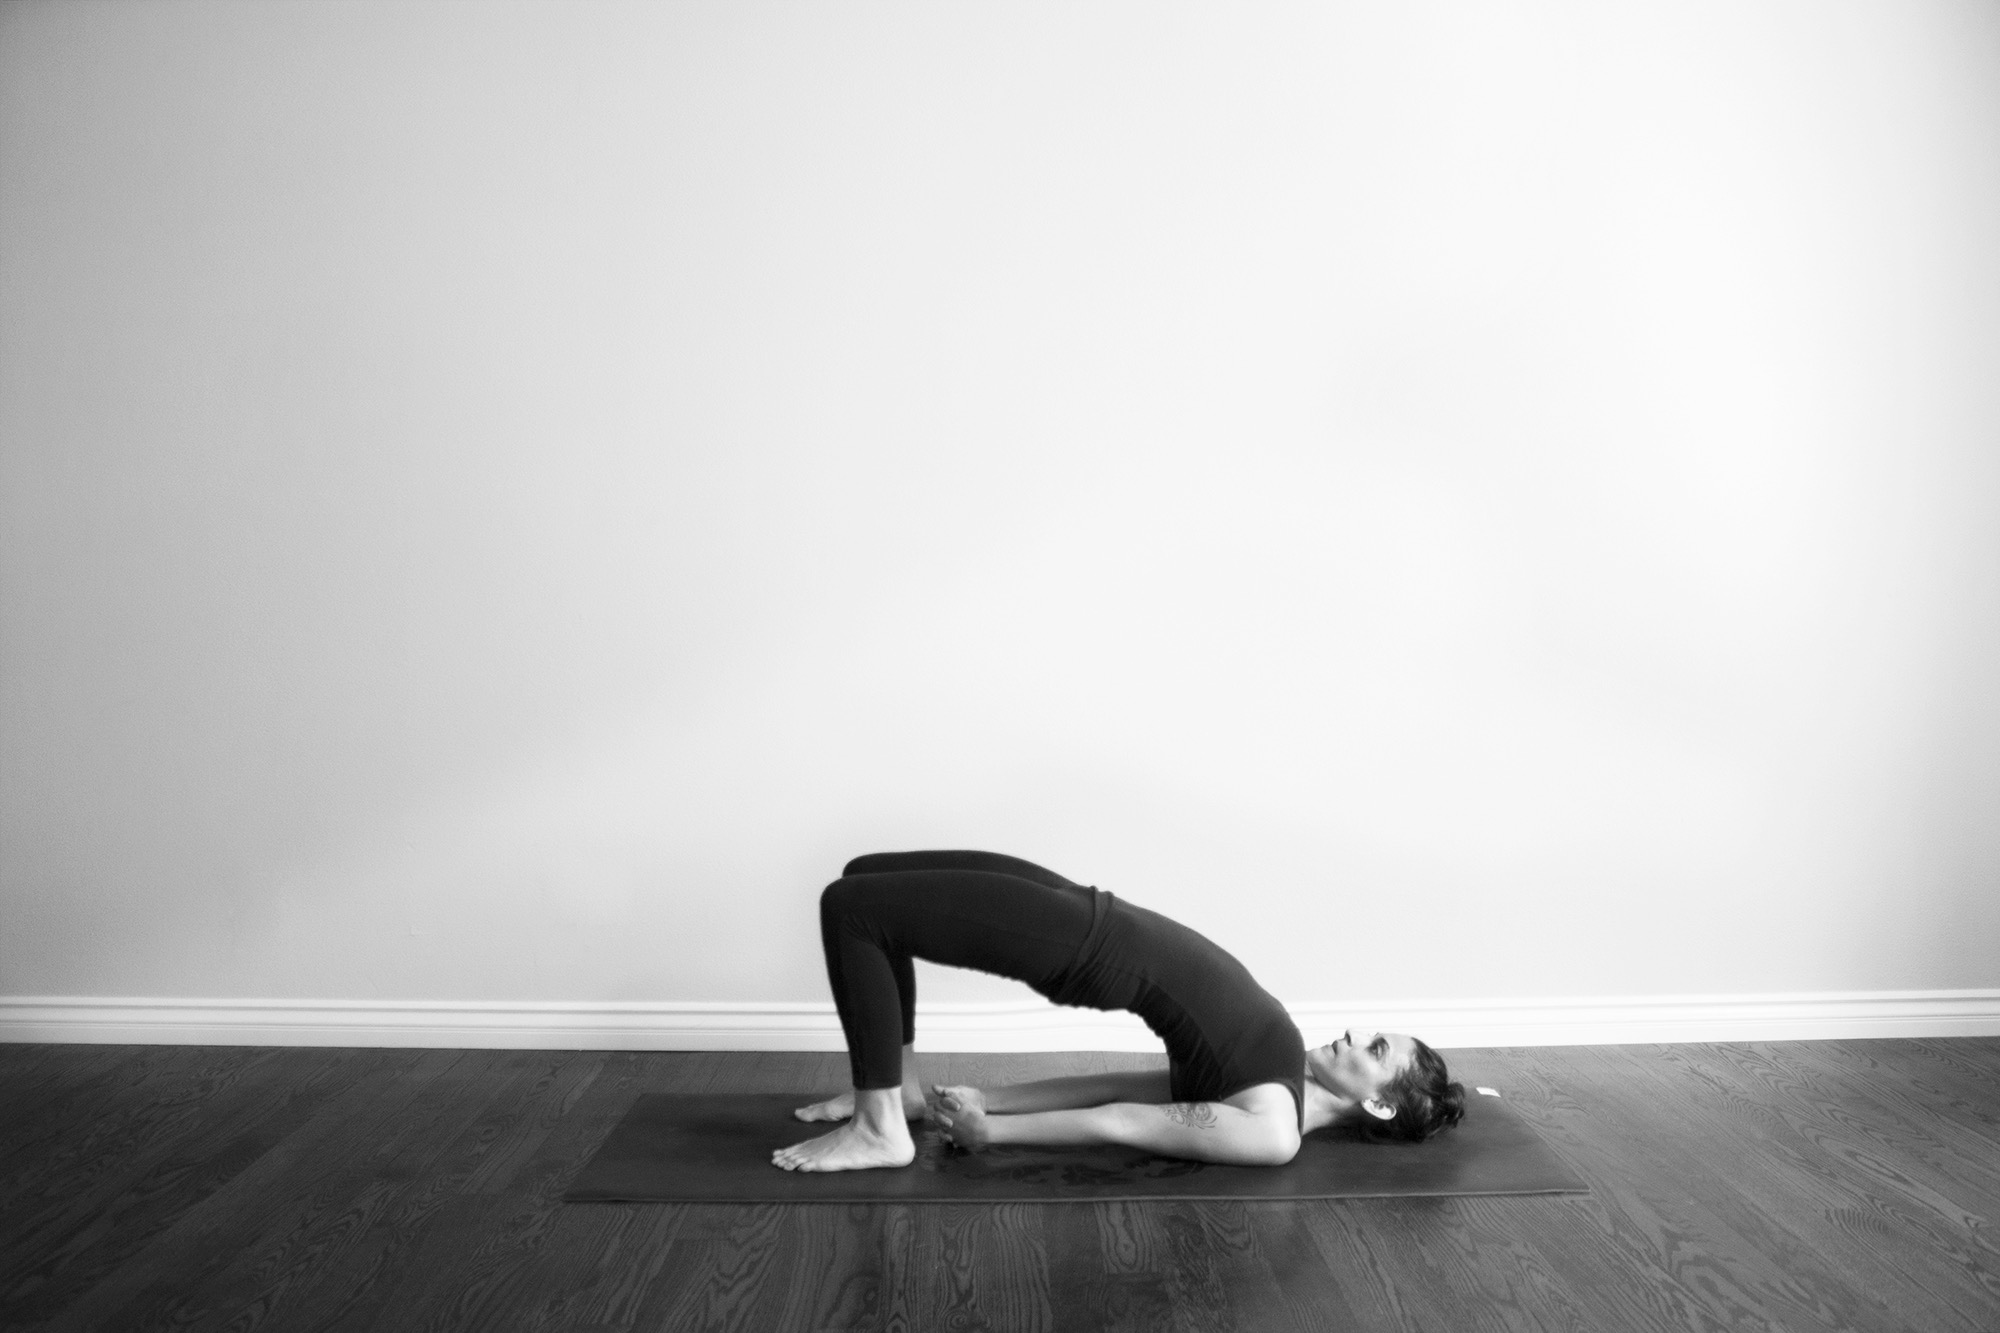
- Root down through the balls of the big toes and inner heels, do not let the feet roll to the outer edges (this will splay the knees)
- Keep the knees hips distance apart (you can place a block between the feet and the knees to help maintain proper alignment)
- Inner thighs release down towards the floor
- Firm the center of each buttock up towards the ceiling to lift the hips up
- Lengthen the buttocks towards the backs of the heels
- Straighten the arms and roll/tuck the shoulders deeply beneath the body, as if you’re resting on your shoulders. The rest of the body should feel light when you’ve rolled/tucked the shoulders properly under the body
- Press the outer upper arms firmly down, fingers interlaced beneath you, inner wrists pressing into the floor
- Broaden across the collarbones
- Lift the shoulder blades in and up to open the chest
- Keep the front ribs soft, the backbend is in the upper chest
Ustrasana – Camel Pose
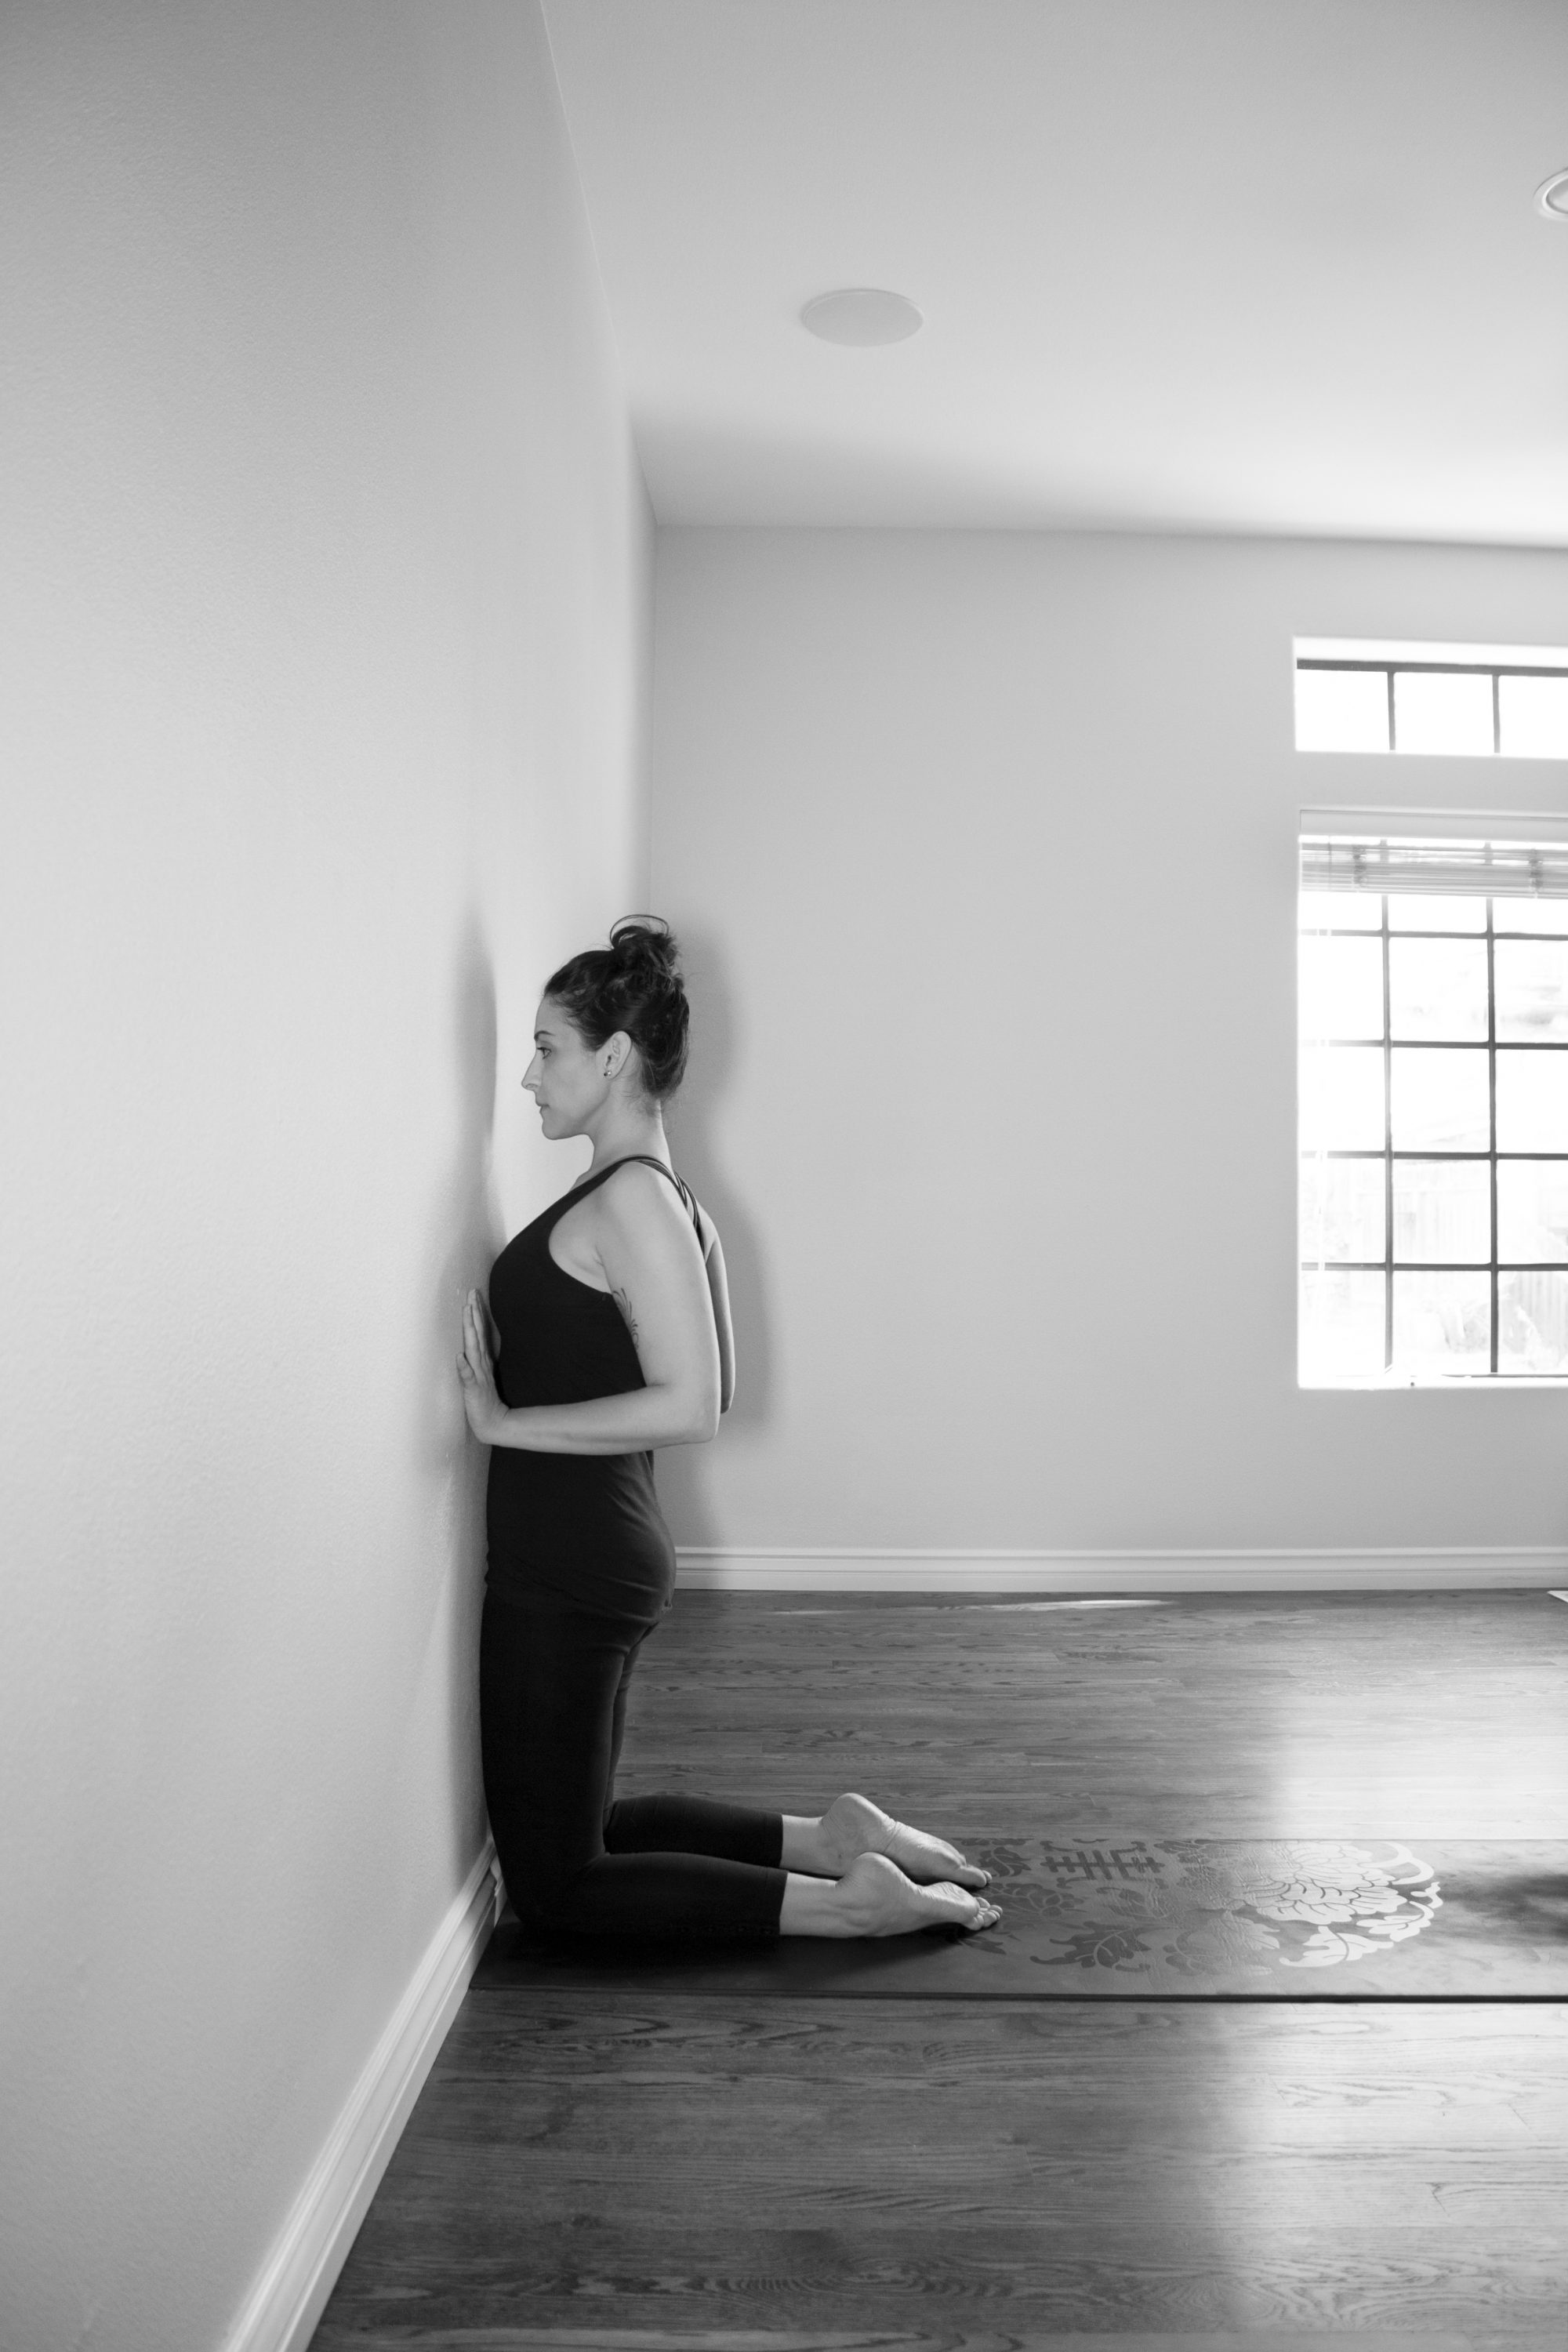
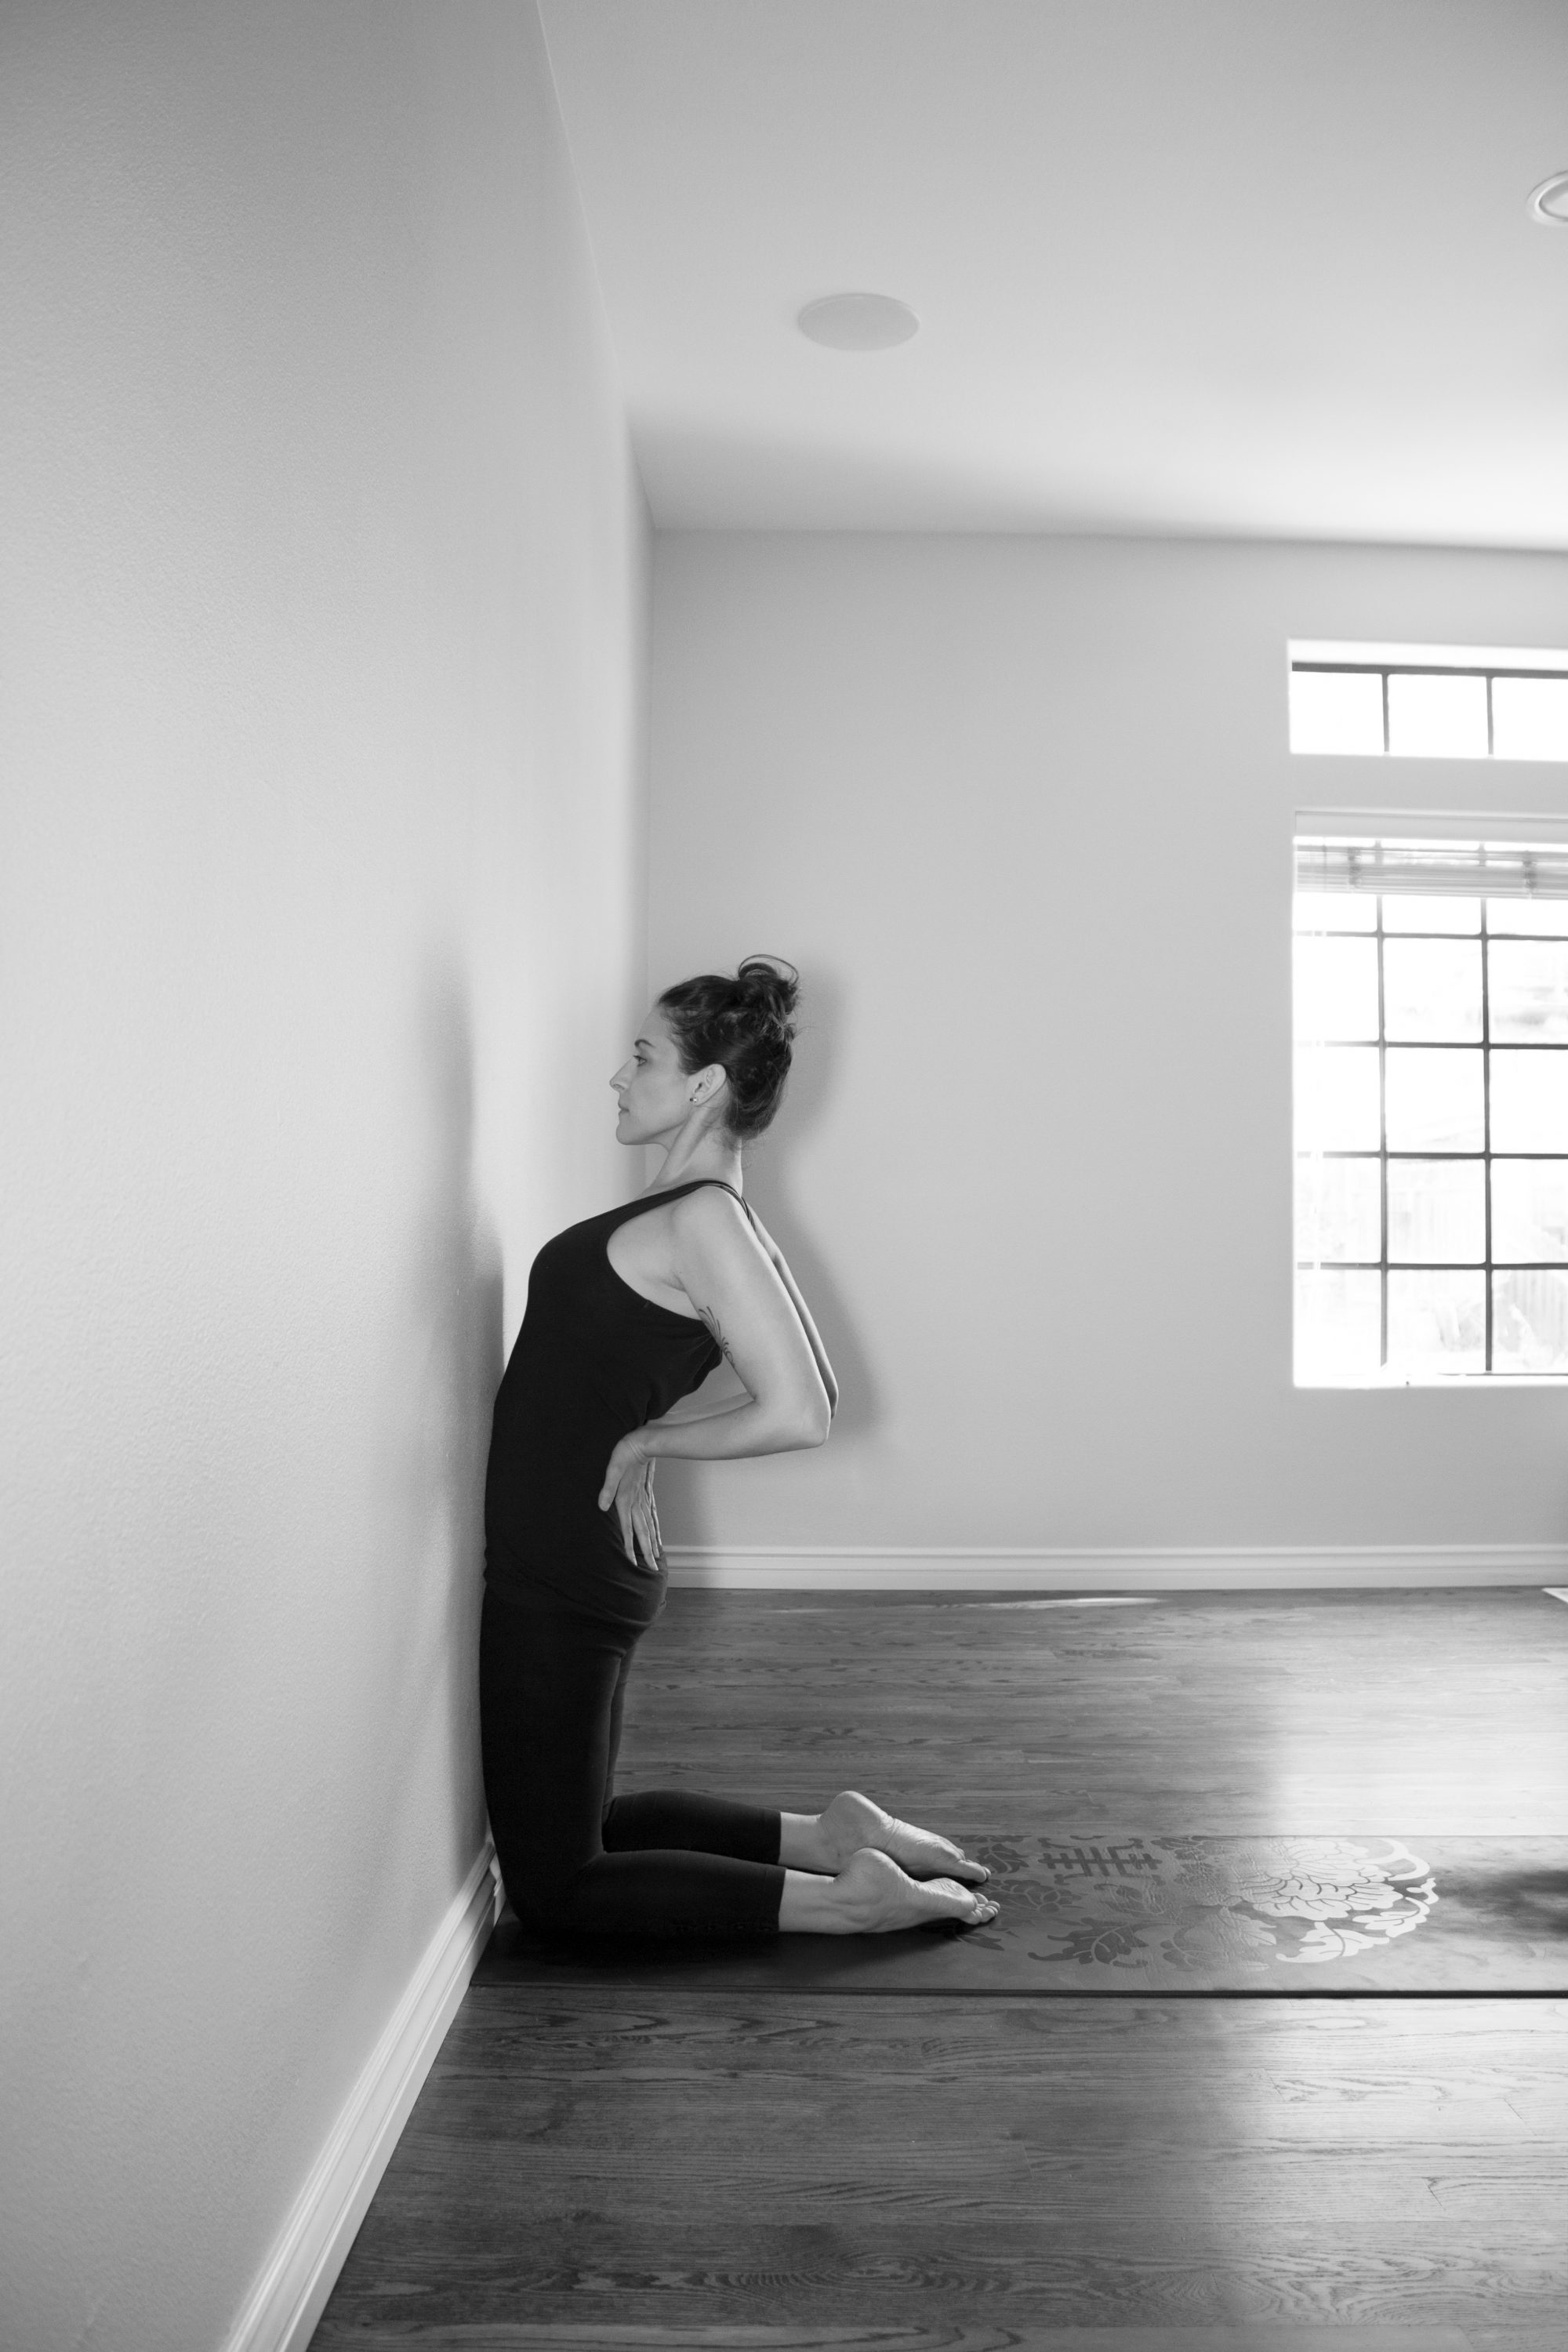

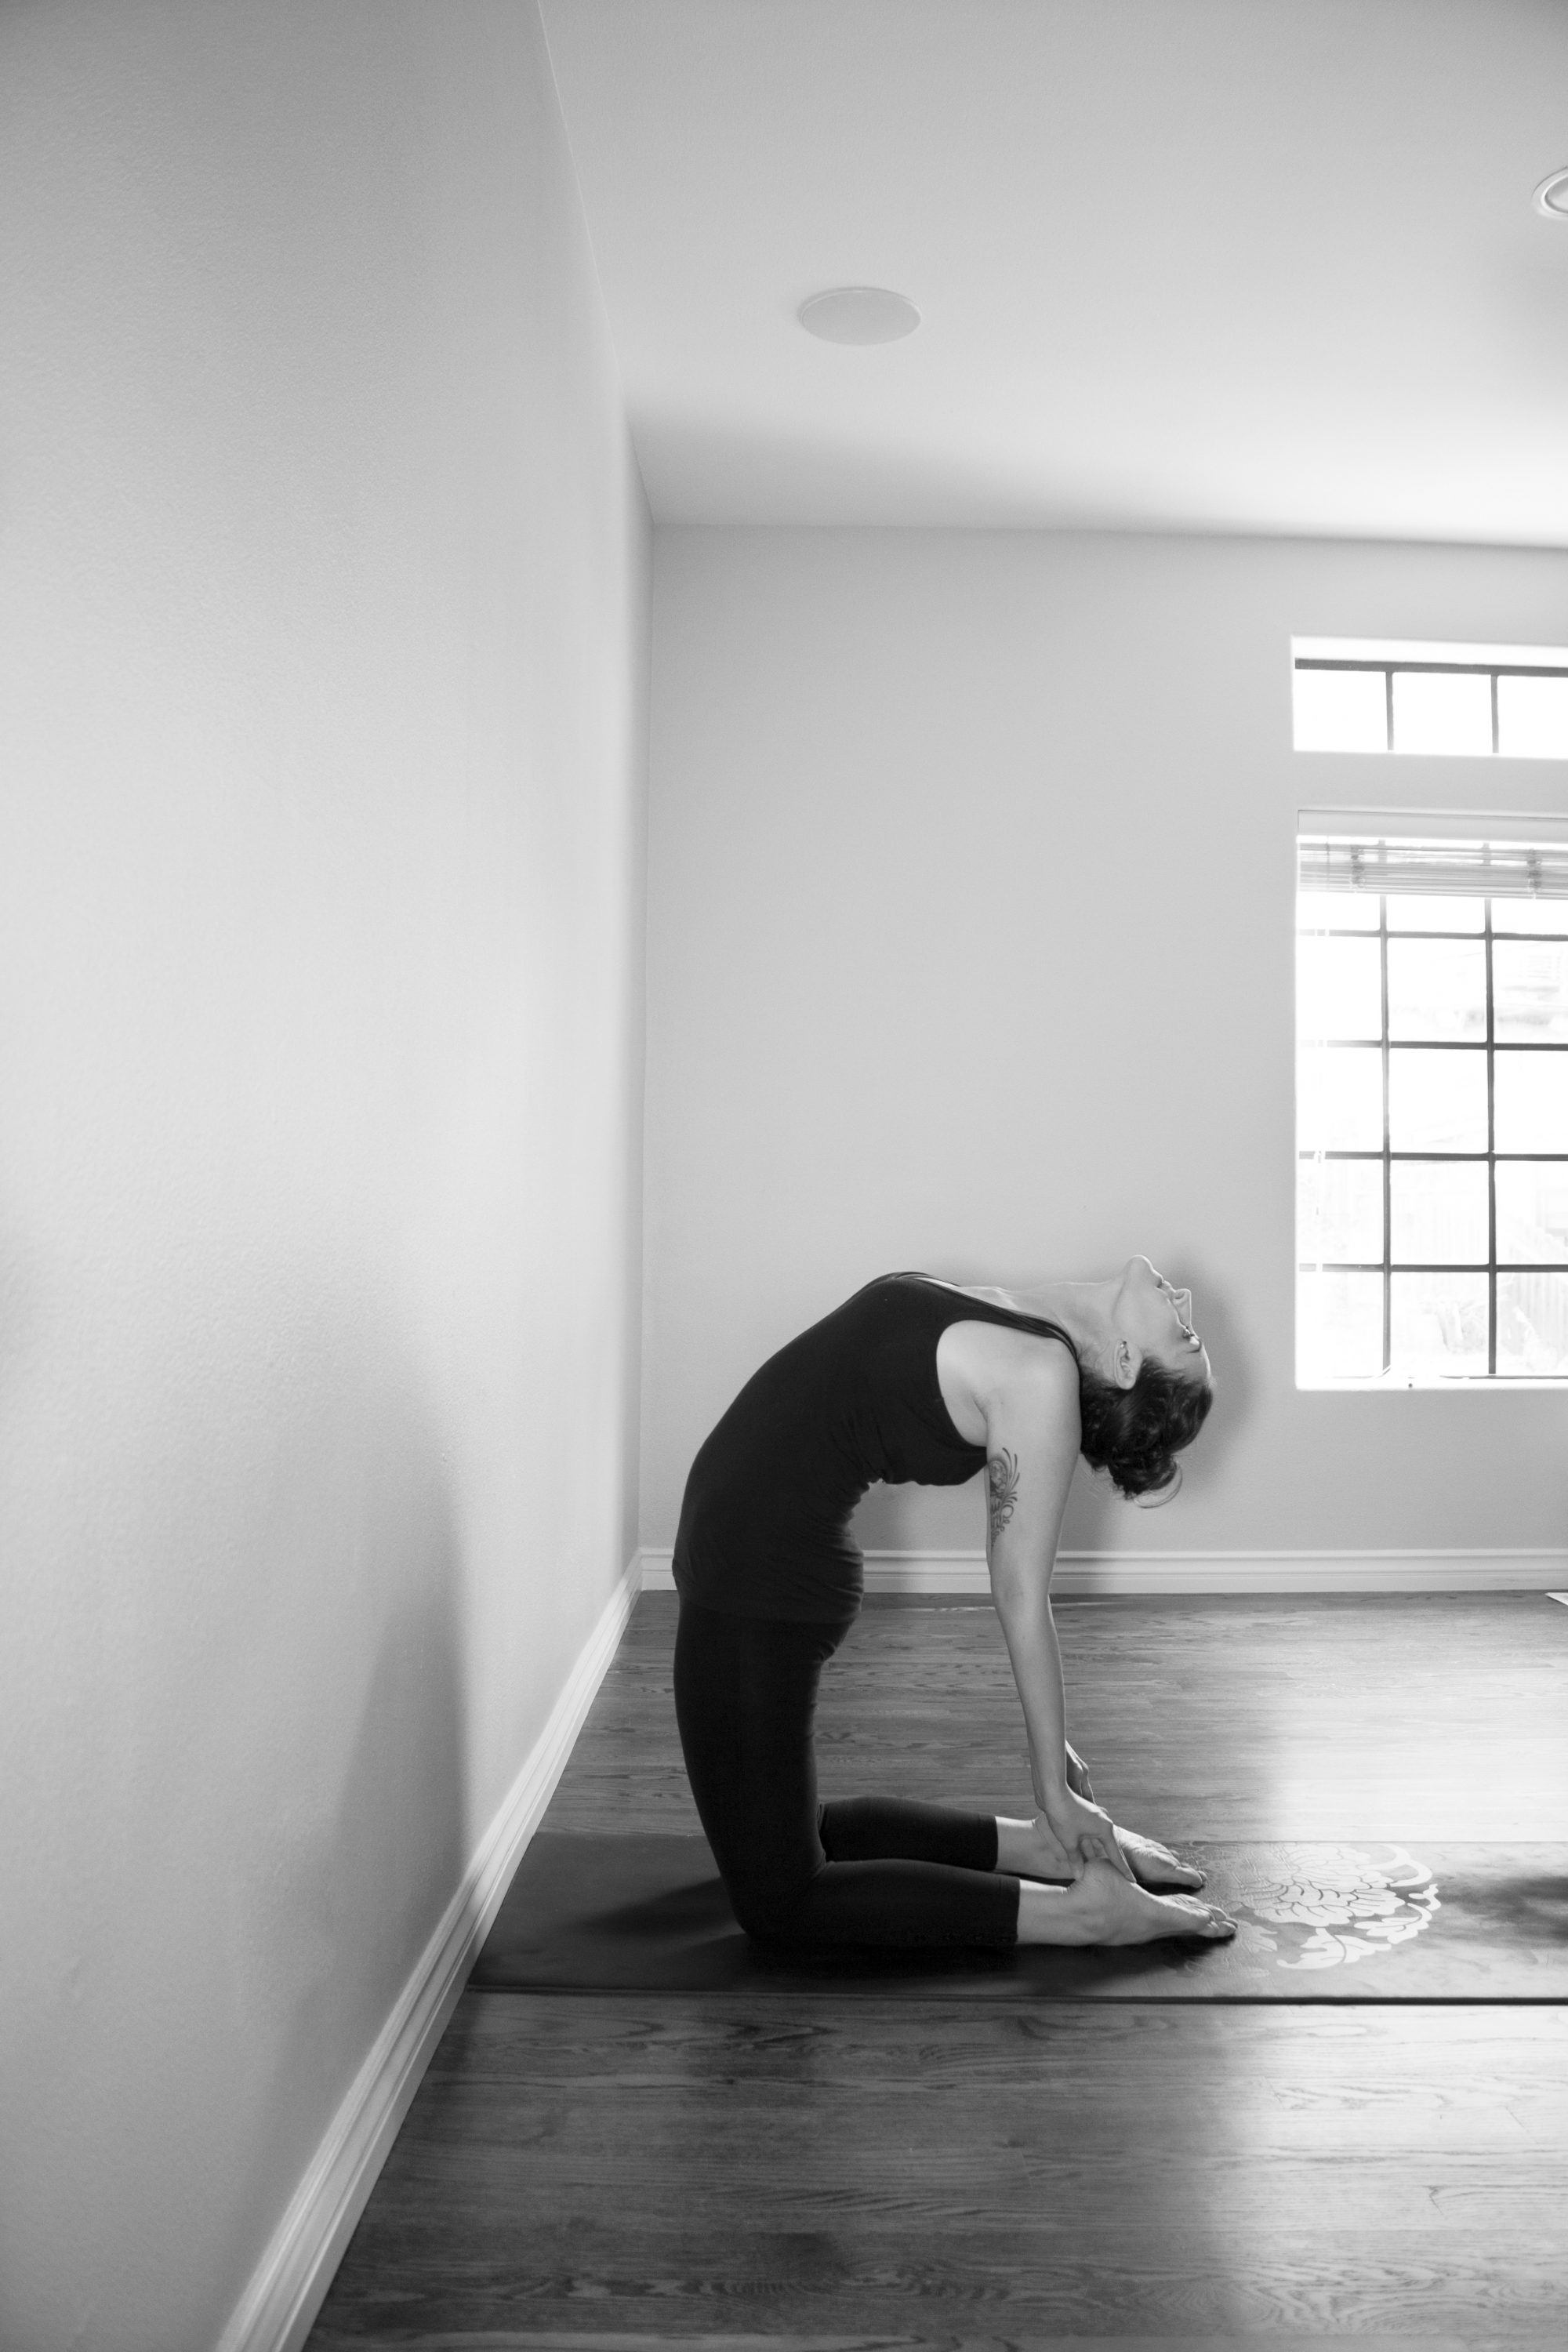
- I like to start off at a wall when practicing this pose. I typically go in stages until I feel comfortable moving away from the wall and going into the pose 100%. There are many variations for this pose. You can place a block between the feet for proper alignment, and you can place blankets or a bolster on the backs of the legs so you have a place to land that’s a little closer than your feet.
- Start at a wall. Knees hips distance apart and feet the same distance as the knees, in line with the knees. The entire front of the body touches the wall. This is a great way to keep track of the hips in this pose. Keeping the hips at the wall as you begin the backbend will teach you where the hips need to be when you decide to move away from the wall (Hips should stay over the knees when in the full backbend)
- I like to start the backbend by just bringing my hands to my lower back. Pressing my hands into my lower back, lifting the chest, keeping my hips at the wall. I then come back to step 1, and then doing it a few more times, bending back a little further each time. I do this no less than three times.
- The last step before I move away from the wall is to reach all the way back to my feet. Then I move away from the wall. Below are the key alignments, no matter how you choose to practice this pose.
- Outer ankles draw in towards the midline
- Press the shins and knees down evenly
- Firm the hamstrings into the buttocks
- Keep the pelvis neutral, neither arching or rounding the lower back
- Tailbone draws in towards the front body
- Lift the back ribs off the back waist
- Lift the sternum towards the ceiling
- Lift the shoulder blades in and up to open the chest, draw the shoulders back
- Keep the arms straight, external rotation of the arms
- Fingers reach in the same direction of the toes, heels of the hands rest on the heels of the feet
- Allow the head to hang freely, arching as evenly as the thoracic spine
Best,
Jenna

Published by